For a Season 5 Last Epoch Mage lightning build, use Lightning Blast to apply Spark Charges on a Runemaster, then scale those charges with Intelligence and Fragment of the Enigma. This is an equipment-dependent transition build: obtain Fragment of the Enigma before committing to the full setup. A Mage who has just started the campaign should keep a working leveling configuration while collecting the required item and unlocking the supporting skills.
The main loop combines Lightning Blast, Runic Invocation, Frost Wall, Flame Ward and Glacier. Lightning Blast supplies damage, Reowyn's Frostguard supplies ward, and the remaining skills support movement, buffs and defensive timing. The configuration below keeps those jobs separate so that rune generation and mana problems are easier to diagnose.
Establish the Spark Charge engine
Fragment of the Enigma is the first item to solve. Its Intelligence interaction is central to Spark Charge damage, so a generic lightning weapon does not reproduce the same engine. Legendary Potential improves the eventual item, but it is not the condition that makes the build function. Start with the required unique itself rather than waiting for an unusually strong legendary version.
Lightning Blast is the delivery skill. Repeated casts apply Spark Charges, which explode with lightning damage around affected enemies. This makes cast frequency useful, but it also creates a practical limit: casting faster is only an improvement while you can keep casting and maintain your defenses. Do not remove mana recovery or ward support to raise a single offensive number.
Intelligence belongs near the top of the equipment plan because it supports the charge interaction. Later upgrades include the Vilatria's Storm Crown Reforged set bonus, but treat that as an additional layer. Build the core unique, reliable casting and defenses first. Replacing several slots at once with an aspirational set makes it difficult to identify which missing interaction caused a regression.

Give each specialization a clear job
| Skill | Primary job | Configuration to check |
|---|---|---|
| Lightning Blast | Apply Spark Charges and attack continuously | Lightning Attunement, then the chosen chain setup |
| Runic Invocation | Cast Reowyn's Frostguard for ward | Immutable Order and the correct action-bar order |
| Frost Wall | Provide buffs, branding and extra casts | Fire conversion with Pyroglass and Lightning Rod |
| Flame Ward | Protect against dangerous incoming damage | Cold conversion and Dual Aegis |
| Glacier | Move and provide the cold part of the rune setup | Lesser Glacier and Snow Blink |
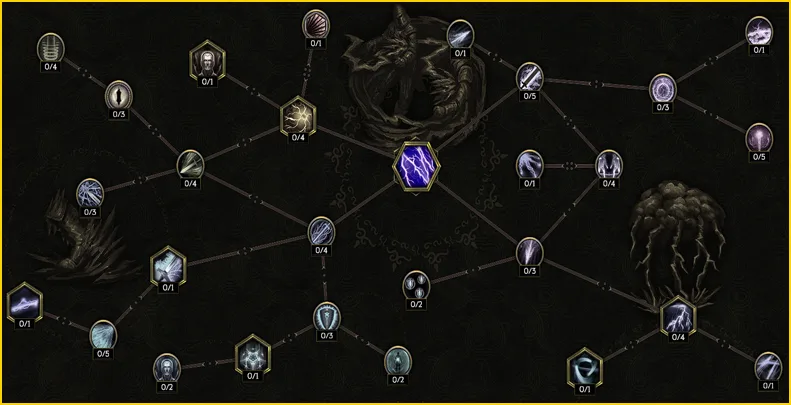
Lightning Attunement gives Lightning Aegis, adding a defensive reason to keep Lightning Blast in regular use. Convergence changes the chain behavior into concentrated single-target hits and halves the chain count, rounding upward. An odd chain count therefore makes better use of that rounding than the adjacent even count. Decide whether you want that concentrated configuration rather than assuming every lightning build must preserve ordinary pack-to-pack chaining.
Halo Effect adds Spark Nova, another spell interaction that can support the charge setup. Before extra skill levels allow the desired arrangement, Shattershock is an alternative damage allocation. Keep the main mechanics intact before spending spare points on an extra effect. A tree displayed with additional levels from equipment is not a point budget that an unequipped character can copy immediately.
Fix rune generation before changing equipment
With Immutable Order, the order of skills on the action bar determines the rune sequence. Put Glacier, fire-converted Frost Wall and cold-converted Flame Ward in the required left-to-right order. This produces the Cold–Fire–Cold pattern for Reowyn's Frostguard in this configuration.
The conversions matter as much as the positions. A correctly ordered Frost Wall that still has its original element will not fulfill the same role. Likewise, an unconverted Flame Ward changes the expected rune contribution. Check the actual specialization nodes rather than relying on the skill icon or on the bar looking similar to another character's layout.
Use this sequence when troubleshooting an unexpected invocation:
- Open the Runic Invocation tree and confirm Immutable Order.
- Check Glacier's position on the action bar.
- Confirm Pyroglass has converted Frost Wall to fire.
- Confirm Flame Ward is converted to cold.
- Return the three skills to their intended order.
- Cast again and inspect the resulting rune pattern before changing unrelated items.
This check is particularly useful after a respec or action-bar rearrangement. A damage upgrade cannot repair an invocation that is producing the wrong skill. Once the pattern is reliable, use Runic Invocation regularly to maintain the ward contribution rather than treating it as an occasional damage button.
Upgrade equipment in a workable order
After Fragment of the Enigma, prioritize enough defense and resource support to make continuous casting comfortable. Mad Alchemist's Ladle is a useful weapon because it combines offensive benefits with utility, including mana on potion use. Exiled Mages are its farming target. You do not need to postpone using it merely because the first copy has no Legendary Potential.
Twisted Heart of Uhkeiros provides a substantial ward contribution and useful supporting stats. When adding it, review health recovery along with the visible ward gain. A build that converts health into ward needs a coherent way to replenish the health it spends; copying only the relic from a complete setup can leave recovery unfinished.
Orian's Descent supplies Intelligence and mana on potion use. Foot of the Mountain is another useful resource item: while fully stacked, it can reduce Lightning Blast's mana cost to zero in this configuration. Glacier movement preserves those stacks. This is a reason to use the movement skill intentionally, not a reason to remain inside a dangerous boss attack just to keep the boots active.
Unstable Core and Abandoned Eyes of the Weaver add valuable skill levels and offensive support. Treat their extra points as a later expansion of the tree. First verify the build with the levels actually available on your character, then add optional nodes as the gear provides room.
Execute the mapping and boss rotations
During mapping, place Frost Wall where its buffs and extra casts can help, maintain the intended invocation, and attack with Lightning Blast. Move through Glacier when useful. Use Flame Ward before a threatening hit rather than after the defensive window has already passed. Keeping one Flame Ward charge available gives you a response when an unexpected rare or boss mechanic appears.
For a boss, establish the defensive loop before committing to a long casting window. Brand the target with Frost Wall when using the Celestial Doom interaction, maintain Reowyn's Frostguard, and then sustain Lightning Blast while the arena allows it. If an attack requires movement, reposition first. Damage uptime comes from surviving long enough to resume casting.
A potion can also restore mana through the equipped mana-on-potion effects. Use that resource interaction deliberately during an otherwise stable fight. If every potion is being consumed simply to keep attacking, investigate the underlying mana problem instead of assuming that constant potion use is the intended endpoint.
As of patch 1.5.2, Lightning Blast prioritizes non-breakable targets. It chains to breakable objects only when the available chains exceed the number of non-breakable targets. That affects target selection, but it does not replace the need to understand your Convergence configuration or prove that a particular chain arrangement is best for every encounter.
Repair mana problems without breaking damage
First identify when the mana loss occurs. Steady depletion during Lightning Blast casts points toward attack cost and casting frequency. Sudden losses after a support sequence point toward the combined cost of movement, wall placement and invocation. Those patterns need different adjustments, so watch the bar through a short, controlled sequence rather than changing every mana-related stat at once.
With Foot of the Mountain, compare casting while its stacks are established against casting immediately after ordinary movement. If only the second situation is uncomfortable, the problem may be stack uptime rather than insufficient maximum mana. Glacier is useful here because it lets you reposition without losing that standing-still benefit.
Lesser Glacier reduces the movement skill's cost by removing its largest explosion. That is appropriate when Glacier is serving mainly as traversal rather than as a second damage engine. Do not spend heavily to enhance an explosion that the selected node has disabled.
Before adding more cast speed, confirm you can complete several normal attack-and-support cycles without the bar collapsing. Faster casting can expose a resource problem that a slower configuration concealed. Restore consistency first; then add speed in manageable steps. This also makes it easier to see whether a new item improved the character or merely shifted the point at which it runs out of mana.
Build defenses around actual uptime
Reowyn's Frostguard and Twisted Heart contribute ward, but a high peak does not mean the character is protected at every moment. Check the ward available immediately after moving, during a boss transition and before re-entering combat. Those low points matter more than a screenshot taken after uninterrupted casting.
Flame Ward remains the response to dangerous incoming damage. Dual Aegis provides another charge, so avoid spending both on routine packs when a threatening attack is approaching. Defensive timing also reduces pressure on health recovery, which can otherwise become the hidden weakness behind an impressive ward number.
Sphere of Protection is a useful defensive passive to consider alongside the offensive Runemaster choices. Intelligence nodes support the charge engine, Calculated Destruction supports critical strike chance, and Decree of the Burning Wind, Jagged Veil and Celestial Doom are damage-oriented options. Whirling Snow supports the chill interaction used with Chilled Touch in Frost Wall. Allocate around the effects you can actually activate rather than selecting isolated bonuses with missing prerequisites.
If you are dying while the damage feels sufficient, retain the functioning charge setup and investigate defensive gaps. Replacing a recovery item with another damage item is unlikely to fix deaths during low-ward windows. A stable casting routine and a usable emergency charge are often more practical than another aspirational offensive swap.
Transition only after the complete loop works
A sensible transition checklist is Fragment of the Enigma equipped, required skills unlocked, correct conversions active, reliable Cold–Fire–Cold runes, sustainable attack cycles and usable health recovery. These are functional requirements. Character level alone does not establish them.
Keep your old equipment until the replacement configuration works through ordinary packs and a manageable boss. Make the initial swap with the required unique and conservative supporting gear, then upgrade one component at a time. If a respec temporarily removes important skill levels, use content that gives you room to rebuild the specializations rather than immediately testing the hardest encounter available.
This Runemaster setup should remain separate from a Sorcerer configuration that uses Glacier as major damage and Arcane Ascendance for burst. Both can use Lightning Blast, but their supporting skills, passive choices and resources are different. Mixing the offensive half of one with the defensive half of the other leaves the character without a complete loop.
Once the Runemaster loop is stable, choose the next upgrade by the remaining constraint: Intelligence for charge scaling, recovery for ward sustainability, skill levels for additional nodes, or mana support for uninterrupted casts. That gives each new item a measurable purpose and avoids changing a working build simply because another planner displays more impressive gear.