
The Last Epoch Weaver Tree changes the encounters, rewards and Woven Echoes available inside the Monolith of Fate. Earn its points through Woven faction ranks and first completions of eligible Woven Echoes, then allocate them around one farming goal. Start by collecting missing points; switch to a specialized setup when the encounters and equipment you need are clear.
This tree does not replace your character's passive or skill trees. It changes the content you run and the opportunities it produces. A setup that increases dangerous encounters can make the same Corruption feel harder, so judge a farming plan by successful clears and useful rewards rather than by the number of loot bonuses allocated.
Unlock the Woven and collect missing points
Complete a Cemetery of the Erased to meet Masque and gain access to the Woven faction. Memory Amber supports the faction's progression and purchases. Tombs and Cemeteries are important sources of that currency, while Masque sells Woven Echoes at the Haven of Silk as your rank opens more options.
Two progression tracks supply Weaver Tree points: raising your Woven rank and completing eligible Woven Echoes. Repeating an echo that already awarded its completion points is different from finishing a missing one. Before buying another familiar echo, inspect which completions your character still needs.
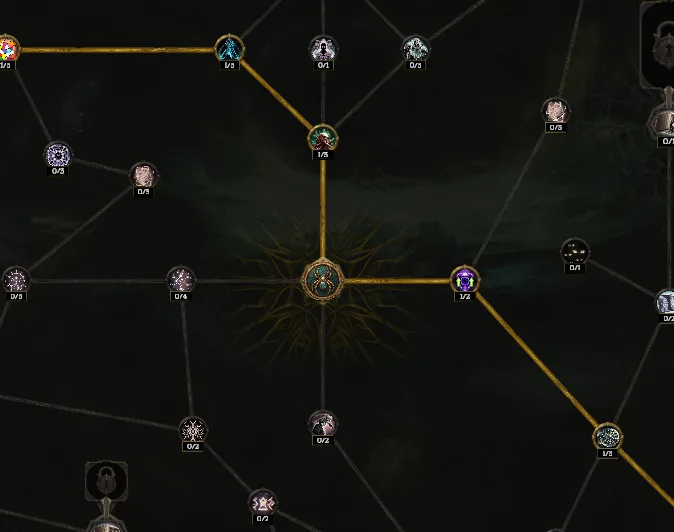
Use this order while establishing the tree:
- Complete the first Cemetery and access the faction.
- Check your rank rewards and uncompleted Woven Echoes.
- Gather Memory Amber through content the character can clear.
- Purchase accessible missing echoes instead of buying duplicates blindly.
- Complete them and spend the awarded points toward your current goal.
- Keep an eye out for drop-only echoes as you continue normal progression.
Not every missing echo can be bought immediately. Some require a higher faction rank, while others come from particular encounters as drops. A point collection plan should include both the faction shop and ordinary farming. Do not assume a missing shop entry means the character has already completed that echo.
Tomb of Vessels and The Fading Brink award more completion points than a typical eligible echo. They also represent different combat demands. Collect easy available points first rather than forcing a difficult boss sequence solely because its completion is worth more.
Build a starter tree around progression
A starter setup should increase access to Woven Echoes while helping the character acquire usable equipment. Woven Fortunes lets Champions provide Woven Echo drops, making Champion encounters relevant to the point collection stage. More opportunities to encounter those enemies complement the same objective.
Tombs and Cemeteries remain useful because they contribute Memory Amber and Woven content. Their rewards can also improve a young Monolith character while you work on the faction. Choose manageable encounters rather than stacking every possible difficulty increase at the first opportunity.
Keep the starter setup broad enough to collect ordinary upgrades. If the character still needs basic defenses or a workable weapon, a narrowly specialized endgame farm may solve the wrong problem. The purpose of early points is to build access and equipment that allow the next specialization to function.
Once your missing-point list becomes short, review the reason for each allocation. Nodes focused on increasing Woven Echo supply may be less valuable when their main job is finished. Reassign points toward the encounters, item categories or crafting resources you now need instead of preserving a starter tree indefinitely.
The Weaver Tree can be respecced using Memory Amber. That flexibility makes a temporary progression setup practical. It also gives you a reason to keep some currency available rather than spending every unit on echoes before deciding whether the tree needs adjustment.
Choose one main reward loop
Several compatible bonuses can work together, but one primary goal should determine the tree. Start with the reward you want, identify the encounter that supplies it, and then improve access to that encounter. This avoids allocating points to several impressive mechanics whose requirements compete with each other.
| Main goal | Useful direction | Check before committing |
|---|---|---|
| Missing Weaver points | Woven Echo access and Champions | Which completions are still missing? |
| General exalted equipment | Champions, Loot Lizards and item imprints | Can the character clear the added encounters? |
| Nemesis rewards | Nemesis frequency and Conquered Tower | Are Tomb and Cemetery bonuses part of the loop? |
| Experimental equipment | Exiled Mages and Rune Prison Complex | Do you have the imprint and access needed? |
| Primordial materials | Rift Beast encounters and suitable Woven Echoes | Are you suppressing their spawn opportunities? |
| Experience and Favor | Enemy density and sustainable Woven Echo placement | Can Memory Amber sustain the plan? |
| Ritual rewards | Rage of Morditas nodes | Can the character handle the second-phase cost? |
A general farm is useful when several equipment slots need improvement. Specialize once one missing item or material becomes the clear bottleneck. Returning to a broader tree later is reasonable when that bottleneck has been resolved.
Use item and Woven Echo imprints correctly
Item imprints and Woven Echo imprints address different goals. An item imprint influences equipment rewards through the conditions of its slot. A Woven Echo imprint increases opportunities for that echo to appear on the web. Identify which kind of imprint you are configuring before judging the result.
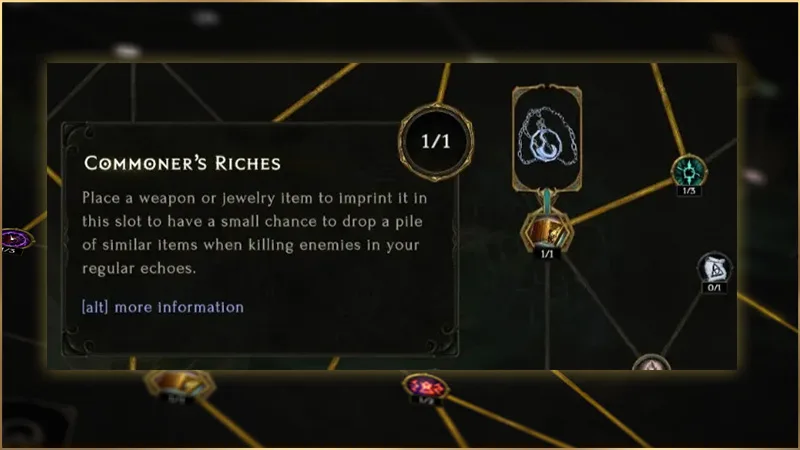
Choose an item imprint for an equipment outcome the build can actually use. A high-tier affix on an unsuitable base does not become a useful upgrade merely because the tier is attractive. Inspect the base, desired affixes and crafting role before treating a donor or equipment copy as the farm's objective.
Imprinting does not promise an exact copy on the next reward. Season 5 improves the frequency of imprinted items from enemies, echo rewards and Lost Caches, and makes the resulting items more likely to retain high-tier affixes. Those improvements still leave randomness in the outcome.
Do not assume every item-imprint slot behaves identically. Warlord's Riches has a different role from ordinary similar-item imprints, so read its actual description before selecting an item. A strategy for sealed affixes should be configured deliberately rather than copied into a farm that simply wants a better ordinary base.
For Woven Echo imprints, use two different echoes when you want two useful encounter types. Imprinting the same echo twice does not provide the extra spawn benefit you might expect. Conquered Tower can support Nemesis goals, while Rune Prison Complex supports an Exiled Mage focus. Choose the second imprint for a complementary need.
Account for the Season 5 web-reset change
Older farming routines repeatedly reset the Echo Web with Sanctuary of Eterra, using Memories of the Observer to reveal early Echo Chains and look for imprinted Woven Echoes beside them. Season 5 changes that interaction: after a Sanctuary reset with the node allocated, those starting chains no longer spawn Woven Echoes at their sides.
That matters when evaluating an old reset loop. The presence of the same node and reset button does not mean the old opening-web behavior still applies. If a plan depends on immediate side spawns after every reset, revise that part before spending a session repeating it.
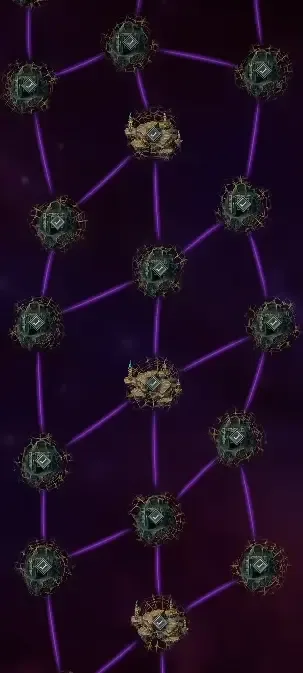
Run the web with a clear goal and inspect the content actually appearing. Prioritize a relevant Woven Echo when it becomes available, and use the other encounters selected by your tree between those appearances. Do not interpret several absent spawns as a guaranteed bug or as proof that an imprint must be duplicated.
Keep Corruption management separate from the imprint decision. A reset, a Shade encounter and a chosen farming difficulty serve related but different purposes. The comfortable difficulty for the character is still important even when you are primarily searching for a particular echo.
Avoid fighting your own encounter setup
Rift Beasts do not spawn in Arena Echoes or echoes containing Tombs and Cemeteries. A plan that makes those spaces more common can conflict with a Rift Beast goal. Conversely, Tomb and Cemetery support can be valuable when the objective is Woven content, Nemesis or Exiled Mages.
For a Rift Beast focus, Nesting Grove adds encounters to surrounding echoes. Check the nearby space and the kinds of echoes that can receive them before placing additional content. Rampant Coast can supply a Crystallized Heart, but its imprint appearance is uncommon; do not assume every fresh web will contain one.
For a Nemesis focus, Conquered Tower and encounter-frequency bonuses work toward the same target. Tomb and Cemetery support can add more value when the relevant tree nodes create Nemesis opportunities there. Keep the farm aligned with the unique improvement or exalted equipment goal that led you to choose Nemesis.
For Exiled Mages, Graveyard Prisons supports Rune Prison access in Tombs and Cemeteries, while Exiled But Not Forgotten can add another mage. Rune Prison Complex is a drop-only Woven Echo associated with high-level Exiled Mages. Continue a viable mage farm while acquiring it instead of assuming the specialized imprint setup is available from the start.
Add difficulty only when the reward is usable
Fury and Fortune increases rune and glyph rewards while making enemies permanently Enraged. The route through Warden's Echo also introduces dangerous dungeon enemies. Together, these choices can change the risk of an otherwise familiar Monolith farm.
Use the character's actual combat behavior as the check. If deaths, resource stalls or long recovery periods become common after changing the tree, remove the offending encounter modifiers before raising Corruption again. A reward bonus has little practical value when it prevents the character from completing the loop reliably.
Hardcore characters have a stronger reason to avoid unnecessary danger, but the same efficiency comparison applies in other modes. More enemy speed or a dangerous imported enemy can demand changes in positioning and defense. Do not treat a popular tree's difficulty nodes as mandatory purchases.
The new ritual nodes also have costs. Ubiquity of Rage increases Rage of Morditas encounter frequency. Seekers of Ice and Blood makes ritual-specific uniques and item subtypes more common while increasing second-phase enemy damage. Portents of Blood adds an Omen in that phase and corrupted items at the end.
Choose these when their rewards suit the goal and the character can handle the altered encounter. A player seeking ordinary crafting bases may prefer a different setup from a player deliberately collecting ritual equipment or corrupted rewards.
Sustain a density farm with Memory Amber
Lostwood Folly adds enemies to surrounding echoes, and Cemetery of Reweaving supports a Woven-content loop with Memory Amber. Combining them can create dense farming areas for experience, Favor and related rewards. The placement plan matters as much as allocating a few supporting passives.
Before building a large nest, check the currency you need to replace the Woven Echoes used in it. A setup that produces attractive rewards but exhausts your Amber immediately needs a different scale or a stronger supply loop. Start with a manageable arrangement and observe the returns before committing the whole reserve.
Clear the relevant side zone as well as the surrounding echo when the plan depends on their enemies. Leaving immediately after one objective can skip the density you paid to create. Conversely, do not fully clear unrelated spaces merely because a different strategy's instructions say to do so.
Favor gained through a density farm still serves the faction system you actually joined. Season 5 Circle of Fortune uses Prophecy charges; its previous reroll routine is gone. Keep that changed reward system in mind when deciding what additional Favor will accomplish for your equipment goal.
Reassess the tree when the bottleneck changes
A completed farm should lead to a new decision. After acquiring a usable experimental item, enough Primordial materials or the missing Woven points, ask whether the same encounters remain the best use of the next session. The tree is useful because it can follow those changing goals.
If rewards are disappointing, check the encounter first, the allocation second and the item expectation third. The desired node may require a particular enemy or reward event; a correct event can still produce a random result; and a good drop may still need crafting before it becomes usable equipment.
Keep imprinted items current as the character improves. A copy chosen early in Monolith progression may no longer represent the base or affixes you want. Updating the target prevents a technically functioning reward loop from spending most of its time producing equipment you have already outgrown.
In patch 1.5.2, enemies killed during the Rage of Morditas gauntlet correctly advance Weaver's Will items. That fix concerns equipped item progression, not extra Weaver Tree points. Distinguish the tree, Weaver's Will equipment and Weaver's Touch on Heretical idols when diagnosing which system is advancing.
The practical sequence is to collect access, choose a reward loop, configure compatible encounters and imprints, then check clear reliability and resource sustain. When either the equipment goal or the character's readiness changes, spend Memory Amber to make the tree serve the next useful task.